Anytime is a good time to get into the garden, but you just have to love the last part of spring and early summer; there is something really special about it!
It has certainly been an interesting few months up until now, not only with October being officially recorded by the Bureau as the hottest October in recorded history, it also seems to be turning into a considerably drier than usual season. For those who garden in urban areas where water seems to be available in endless amounts, it seems the only governing factor limiting water usage is the water bill. We know that plants need the water and we all want great gardens, but we also need to be smarter with the way in which we use water in the garden. To help you with your water usage, take some time out to look through these resources for some further tips and inspiration: https://gardens.rtbg.tas.gov.au/watersense-gardening/
In the last instalment of Tips and Tricks I mentioned the use of hay in the production garden. Hay has so many advantages over other types of mulches and I would recommend it above the use of straw. For one, it is not that readily blown around when it dries out and it provides a better coverage of the soil. As previously mentioned there will be some grass weeds, however many of these can be destroyed if you water down the bales and let them partially compost a few weeks prior to use, rotating the bales throughout that time. If you don’t do that you might get some weed growth in the garden (usually small grasses), let them sprout up until they are around two to three centimetres in height, then with gloves lift up the hay mulch as a uniform sheet as big as you can handle and turn it over, weed problem covered and their nutrients returned back to the soil. Remember you need at least a depth of 200mm of hay at all times to be effective. It will sink with time so regular top ups are essential.
Other Tips and Tricks
Bountiful Beans
I love the warmer months as it means that I can plant one of my favourite crops, the very easy and highly rewarding string or bush beans, as they are known. These usually come in two main forms the so called climbers or the dwarf bush forms, the latter very rarely getting above knee height. Both can bare heavy crops of fresh beans throughout the warmer period. Why not try them out? They are expensive to buy in the supermarket and yet so easy to grow, everyone should have a go!
If you already have a soil patch that you have previously cultivated you will not need to do a great deal to the soil to achieve a result. If you have been using hay mulches regularly there is very little that you will need to do to keep the beans happy; in most cases there is not even the need to add the usual scatter of agricultural lime or dolomite as the pH and nutrient levels in a hay based soil is usually spot on. Just scrape back any mulch to the width of the planting area, then cultivate a shallow furrow a few centimetres deep, pop in your bean seed, cover, and water well and they will be up in about 14 days through the warm weather.
I always like to add a small pocket area (two or three bushes), of dwarf bush beans here and there throughout the garden. Normally the plantings are spaced apart at two to three week intervals to ensure a succession of harvests till mid-autumn. I often like to plant out my leafy vegetables in and around them as the beans, being legumes, will impart some of the nitrogen fixing goodness to the plants immediately around them, once again negating the need for additional feeding.
Anyone For Squash?
Another one of my favourites for the warmer weather is the button squash, they are as easy to grow as their close relative the zucchini, yet they can be much more delicious to eat. If you grow them yourself you will find that the golden forms in particular are little buttons of pure sunshine and they can be beautifully sweet. One of the easiest ways to grow these plants is to lightly cultivate your planting soil, add extra home compost if you see a need, (no need if you have a regular hay mulched garden), then prepare your planting area. These plants love their water through the warm weather and to make sure that they get it and it doesn’t just run off, plant them in a shallow crater or swale roughly 40cm in diameter. This swale can be filled with water, allowing a few moments for the water to soak in, adding extra if it was a particularly dry soil, then directly push your seeds into the moist soil with your finger. Up to 14 days later the small plants will appear and by mid-January or if not sooner, you will be reaping the rewards. Remember harvest them regularly at around ten centimetres or less diameter, because just like zucchini they become large marrows quickly.
A ‘Nip in Time’
I still find time in November to plant some parsnips. I love them as a carrot and parsnip mash, baked, or in a nice mixed vegetable soup but I do find them expensive to buy in the supermarket. Once again they are easy to grow and they tend to propagate themselves if allowed to go to seed. You will find that parsnip planted too late in the growing season will go into the winter months at too small a stage of development, and the winter cold causes them to then run to seed the minute the warmer weather starts again in the spring. So the answer is to plant them so that they can get to a good size before the cold weather starts. The later cooler weather will then encourage the sugars and full flavours to develop for harvest. When planting parsnip seed make sure the seed is fresh and then plant in a lightly cultivated bed. Make sure that you keep the soil moist for germination and throughout the early life of the younger plants, if they dry out at any time through the early stages and the weather is hot, they will quickly run to flower and seed. By the way, parsnip belongs to the same family as parsley, dill, fennel, carrots, chervil and coriander and they look terrific in flower. The flowers also provide nectar and pollen for beneficial creatures such as the adult hoverfly whose caterpillar like young, (although maggots really), will eat aphids and other annoying insect creatures in the garden.
Cabbages and Kings
As I mentioned last time the brassica group can be consistently cultivated throughout the year in Tasmania. However the summer period brings more pests particularly cabbage white butterfly and cabbage moth larvae (caterpillars), as well as cabbage aphid which can be horrendous on broccoli and cauliflower in the warmer weather. Broccoli and its other continuously harvestable form broccolini, plus certain later heading forms of cauliflower, can be planted in this period. They need to achieve a good plant size in the warmer weather, with even later plantings producing heads in the mid to late-winter that will be free of pests. Don’t worry if the young brassicas get damaged by caterpillars through the growing season, they will inevitably bounce back into new leaf and continue to grow. If you really need to treat the caterpillars, try using a biological treatment like Dipel, (also the active ingredient Bacillus thuringiensis is found in some other caterpillar killers); that, apart from caterpillars, is harmless to other creatures including us. Dipel is the commercial name for a product that contains a type of specialised bacteria, Bacillus thuringiensis that targets only caterpillars.
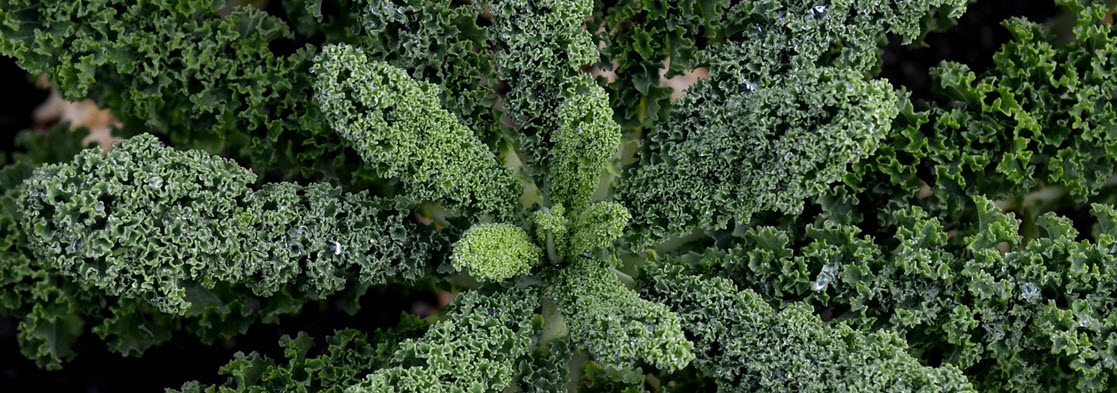
Kale is back again as one of the trendy vegetables to eat, which is great, as they are incredibly good for you; they have an excellent flavour, and are wonderful to look at as well. I particularly like the crinkly leaf varieties but they all have a place in my garden. Once again, like all brassica, they suffer from pests through the warmer weather but if you can cope with that, and also encourage their natural predators such as insectivorous birds, you will not find too much damage. Once more, soil cultivation prior to planting is best with an addition of extra compost if you wish. Apart from its other many benefits, compost is also a good source of sulphur and an important element that brassicas take up in abundance.
Another brassica not commonly seen in the average home garden but essentially great to eat is the Kohlrabi. They are easy to grow from seed; start them in little planter pots like Jiffy™ pots on a sunny window, then plant them out in the garden as for other brassica. Plant your Kohlrabi seedlings a little deeper up their stems to about a centimetre or so from their seedling leaves; this will ensure that they do not topple over while young and provide you with a plant that can support itself better into the future.
Harvest the Kohlrabi when the stem bases have swollen to the size of a small to medium fist; don’t let them get too big as they get woody. The bases taste like sweet broccoli stems and are great cut up for stir fry, or for soups and crispy additions to salads.
Other Cute Cucurbits
There is nothing like fresh cucumbers straight from the garden, bursting with freshness and flavour in a salad, or just on their own with a sprinkle of salt and pepper. Once again easy to grow and you can still get them in now, with fruit through late summer, if not earlier. They are a trailing vine-like plant but they do not need to grow up a fence or trellis; they are equally happy trailing over the ground. Treat them the same way as you would for growing zucchini or squash (see above), and you will be surprised at the great results.
The Rituals
Many people function at their best when they have a regular routine, set guidelines or even rituals in the garden that they perform at calendared times throughout the year. This seems to be the case with certain gardening activities in Tasmania. For example, it is often said that with the planting of tomatoes, “one must only plant from October 22 (Hobart Show Day), each year”; the question is, do we really need to do this? Additionally, many also have their own specific methods of planting their specialty tomato crop; the secrets of which have been passed down through the family, or perhaps from the guy down the road whose family name has a Mediterranean resonance! Because of course, we all know that everyone from that neck of the woods was born with a golden garden spade in their hands, and the secret of a brilliant vege garden just must be “in their blood”!
The truth is that there are so many variables impacting on a successful harvest in Tasmania, from the variable weather to even the location or topography of your land, all potentially have an effect on the success of crops. Even worse in Tasmania we have an abundance of specific localised conditions and climates that can change within only a few kilometres, therefore sometimes limiting the value of certain general garden advice. It certainly pays to understand your own site and its specific variables, even recording the details for future reference.
So with all that in mind do we need to stick to the rituals or can we get out and try something new? Well it is very much up to you, do you feel lucky? Get out there and go for it I say, experiment and try something new. You will never know what you may discover, and best of all you can pass on your success or otherwise.
Just so many thing s to do!
Plant herbs that you need: coriander, parsley, chervil, Vietnamese mint and standard sweet mint, sweet basil, Thai basil and lemon basil, spring onions, thyme, sage and oregano. Also dill and Florence fennel.
Other vegetables: Get the last of your pumpkins in now, they are really at the latest in November and early December as well as sweet corn. If you have a warm location and can provide full sun and plenty of water, try egg plant, the small varieties and early fruiting forms are best. Chili plants can still be planted out, and why not try them planted in a large plastic storage boxes similar to the ones you see sold in the low cost bargain shops. Drill some holes in the box bases and fill with a good potting mix, feed with pellet manures and / or blood ‘n’ bone. These can then be brought inside during the colder months to a sunny room or sheltered sunny veranda.
Fruit trees:
Hay mulch your fruit trees to a minimum 200 mm thick right out to the end of the canopy, or for smaller trees at least up to 1 m from the trunk. Make sure they are getting regular water to help fruit set in the months before fruit ripening. Remove any base suckers sprouting from fruit trees before they get to any size. These are the shoots coming up from below the graft zone on the trunk, just above root zone. Try under-planting fruit trees with other flowering plants and herbs that can attract beneficial creatures to your trees.
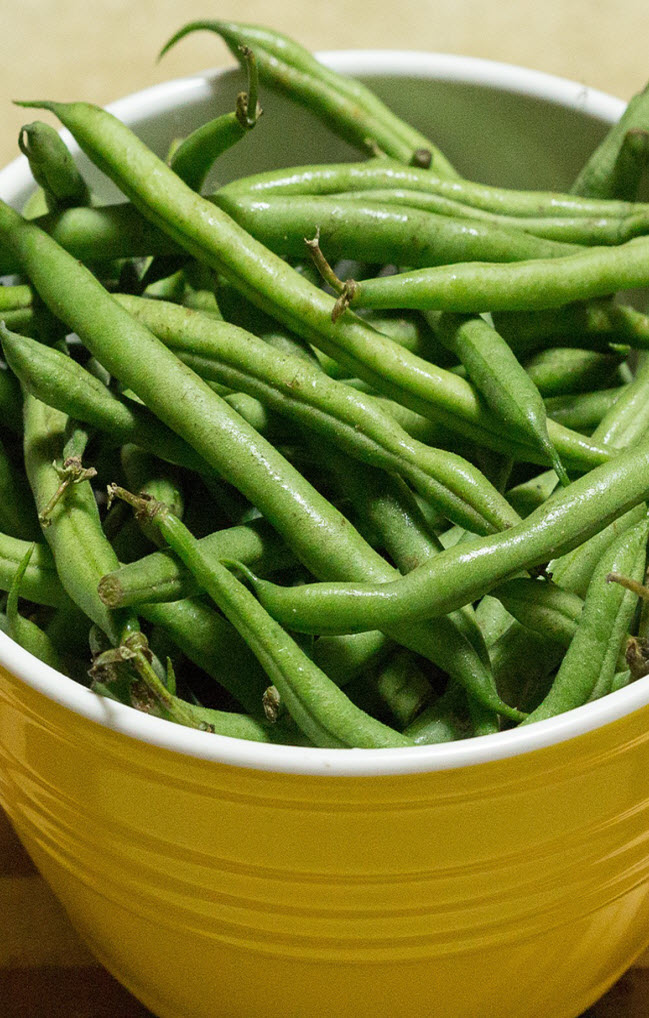
Freshly harvested Green Beans
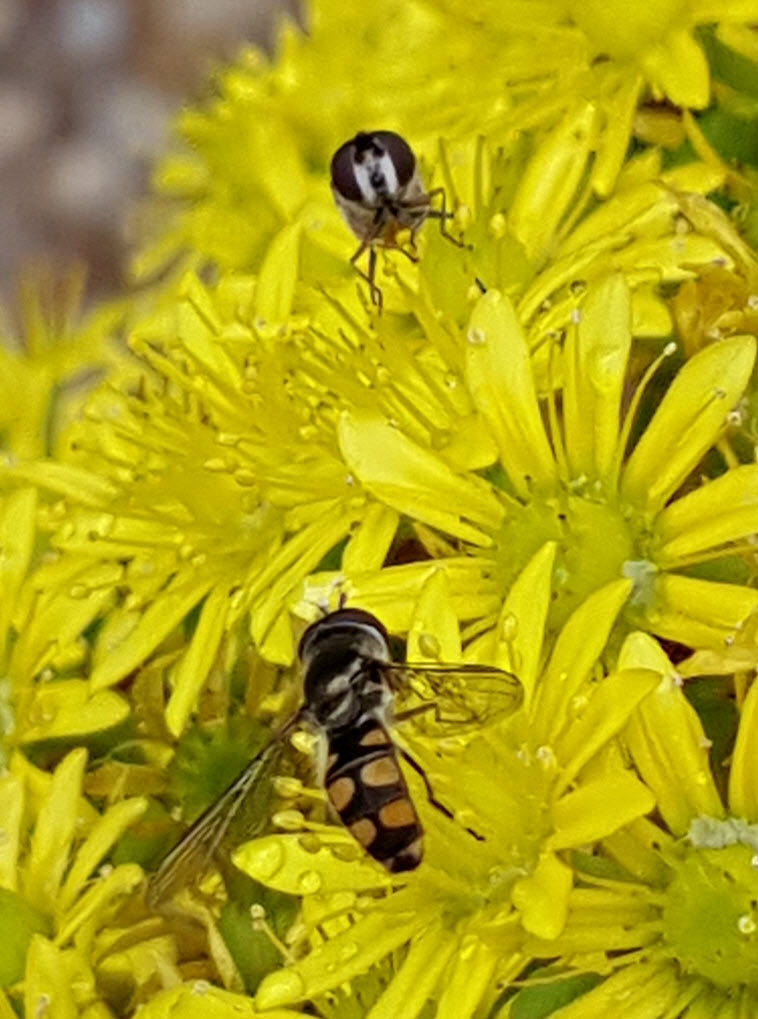
Beneficial Hover flies on Aeonium flowers in the Gardens
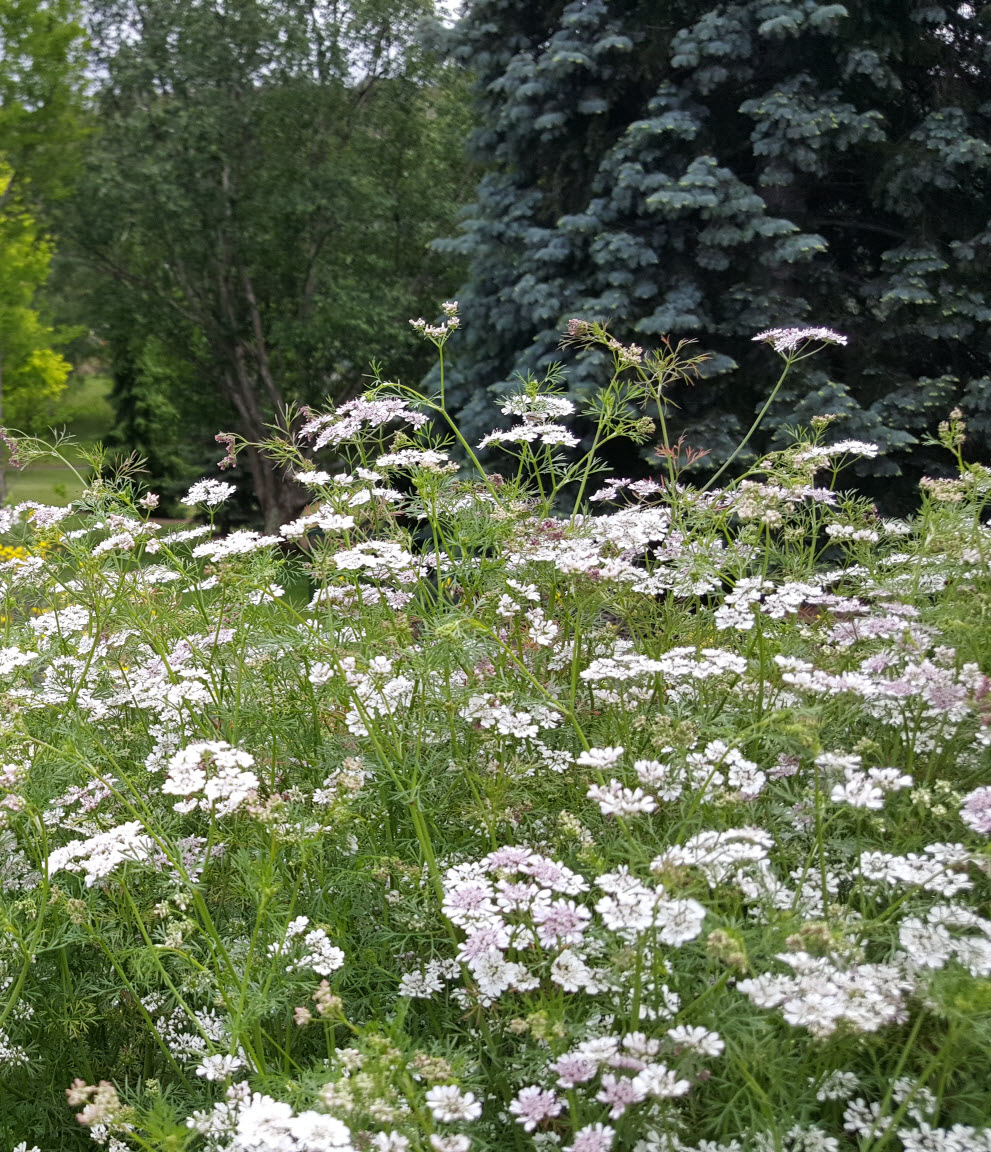
Flowering coriander in the garden
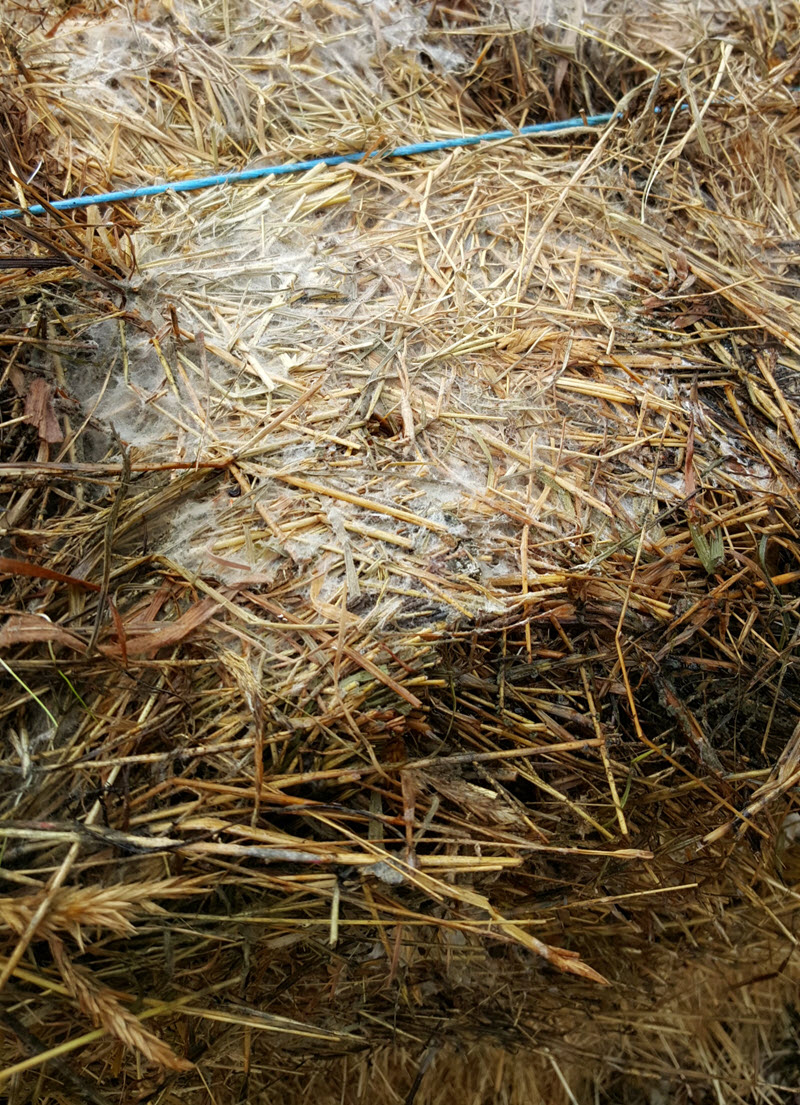
Hay composting on the bale. Most weed seeds are destroyed at this time. The white fungus present is one type of fungi that contributes to the hay breakdown.
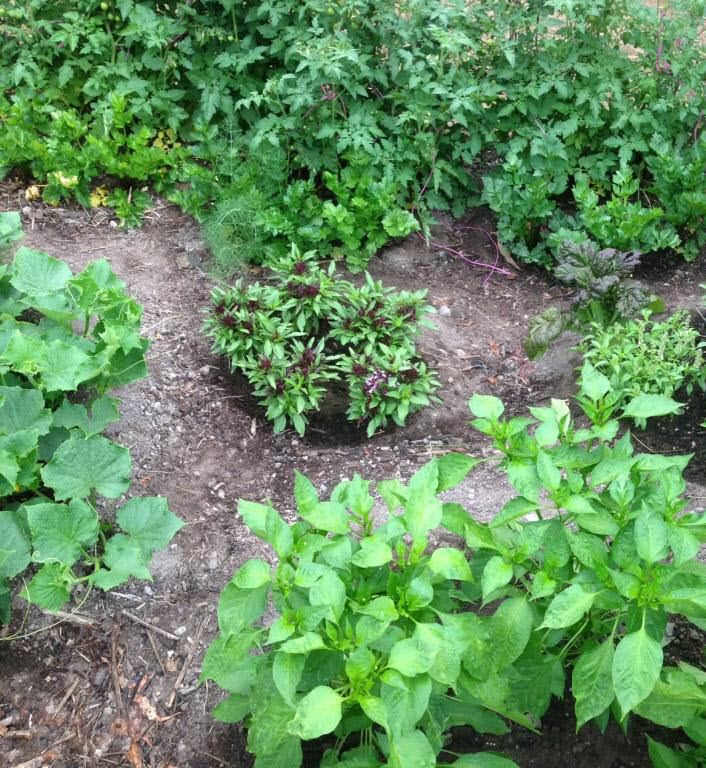
Herbs and vegetables thriving in circular swales or craters